Categories
iOS & Mac reviews

iPhone review: Stow – a slick packing checklist app

stow packing app

I like apps that do one thing really well, which is the main reason I really like Stow (£1.49), a checklist app dedicated to packing for a trip. I’ve already got plenty of apps that could fulfil that function such as Drafts, Simplenote, Things, or Reminders, but they’re all either too general and lack features, or are focussed on different sorts of checklists.

If you don’t travel much then any one of those apps would do the job for the occasional packing list but Stow provides certain features dedicated to the needs of the regular suitcase lugger like template lists, weather-specific suggestions, a departure countdown, list-sharing options and a button to ‘unpack all’ when you arrive at your destination so you can check it all off again before you return, which is very handy.

It even automatically adds the right number of underpants and socks based on your travel dates – unless you tell it you’ll be doing laundry while you’re there.

The app has a clean look and feel, using left and right swipes of the screen when in List mode to bring up more options or add new items, with a few of the most important functions in a bar along the bottom of each screen. It’s cannily avoided going the skeuomorphic route so it’ll fit in well with iOS 7 – although the icon is a deliciously pushable button.

Flexibility

While Stow would evidently be very useful for the frequent traveller, I don’t travel that much. Instead, I got Stow to see if I could use it as an equipment checklist when I’m packing for photography shoots. I’ve taken a few minutes to pretty much empty the pre-loaded item pool, removing all the stuff for golf, ski and city trips, adding a new category called Camera Equipment and filling it with every bit of kit I own from cameras and lenses down to tripod mounting plates. Then I saved a new template list called Photo Shoots that contained the lot, plus a few other essentials like ‘phone’.

Now when I have a shoot I fire up Stow, start a new ‘trip’ and pick the Photo Shoot template. It loads all those items into a new list and I remove any that I’m not going to need for this particular job. In future I might create more specialised template lists; for example, a portrait shoot will likely call for my strobes, lighting stands, umbrellas and softboxes, whereas on a unit stills job I can leave all that lot at home but I’ll need to remember my Sound Blimp.

Again, it’s nothing I couldn’t have tapped into Reminders or even done with a pencil and paper but knowing that I’ve got all my kit saved into Stow’s list templates reassures me that I’ll not forget to add something obvious to my list, like I might if I was having to write it out fresh each time.

Niggles

There are a few little bugs and niggles that still need ironing out. For example, sometimes Packed checkmarks don’t display when you reload the app, but reappear when you switch to the ‘unpacked’ or ‘everything’ tab and back; I occasionally had trouble getting the ‘hold to delete’ function to register my touch correctly, and when adding items to a list sometimes the counter next to each item would zero as I scrolled down past it.

The item name rows are quite short, only displaying 13 characters in the item pool screen because of the add and remove buttons, so if you’ve got a lot of items with long names (such as ‘Nikon 24-70mm f/2.8 lens’) you’ll have to use some abbreviations (such as ‘Lens 24-70’) to make it easier navigating the list.

Everything is ordered alphabetically which is definitely the best default but I’d like to be able to tap an Edit button and move things around if I want. For example, I’d like to be able to put my cameras, batteries and memory cards together at the top of the list. This is possible with a bit of crafty renaming to game the sorting system but it’s messy.

A bigger bother for me is that you can’t tap the iPhone status bar to jump back to the top of a list. I found myself trying to do this again and again, particularly at the bottom of a list and wanting to search for the next item – Search is at the top, so you have to ‘swipe and swipe and swipe and swipe, and type’, instead of ‘tap, and type’. Annoying.

To conclude

Despite those niggles I do really like Stow and it’s definitely worth a look if you’re after a packing checklist app. It’s not quite what I was looking for (an equipment checklist app specifically for photographers) but its customisability let me bend it to my needs while taking advantage of all the packing-focussed features, and the design strikes just the right balance between simple and clever in an iOS7- friendly package. And as a bonus, next time I go on holiday I’ll already have a packing app ready to go.

Categories
iOS & Mac reviews

London tube apps: three of the best

I spend a lot of my time travelling around London on the underground. It might not be the cheapest way to get about but it’s almost always the fastest and most efficient – unless you happen to have a helicopter at your disposal! Unfortunately you can easily get caught out if your preferred route shuts down either for engineering works or faulty signals – we’ve all been there, and it sucks if you find out too late, so I use a selection of excellent London tube apps to make it all a bit less hassle and a bit more fun:

This is going to be a pretty lengthy review of each of these apps, so if you’re pressed for time here’s the lowdown: Tube Tracker and Tube Deluxe both do pretty much the same job of planning your route, finding nearby stations and tracking those pesky delays with a custom update pushed to your phone and while I personally favour Tube Tracker I can recommend you try out both; and Tube Exits is a genius app that tells you which carriage to get on to arrive directly opposite the station exist, shaving minutes off your journey especially during rush hour.

This post is ready to depart, please mind the closing doors…

Tube Tracker

Tube Tracker (£1.99) is definitely my favourite right now. I was already using Tube Deluxe and didn’t notice it until it launched version 2 in January 2013 with a big redesign in favour of a distinctive, flatter sort of look which I really like. It feels different to a lot of iOS 6 utility apps, going for neither a heavily skeuomorphic design, nor one that uses much, if any, of the standard iOS 6 glossiness.

london tube apps tube tracker

Tools are collected in tabs along the bottom. First up, Stations presents a list of the nearest stations to you, each accompanied by a live compass arrow to point you in the right direction. Tapping a station name presents TfL live departure information (where available – as with all apps using TfL’s data, if it’s not available the app can’t do anything about that), while drilling down into particular trains presents an almost-live depiction of their location on the line which is pretty cool.

Maps is self-explanatory offering both a local, searchable copy of the official London Tube Map, and a Google map of the surrounding area along with a handy ‘5/15/30 minute walk’ radius. There’s no single-line maps like you find inside the tube trains themselves.

tube tracker lines plan

Lines displays the line status as you’d find on TfL’s Live Status web page but tap the clock in the top right and a timeline slider drops down, letting you swipe through the calendar and monitor planned engineering disruptions for the next three months all on one page. This is a good design choice – the other app I look at below splits the date selector and results across two pages, which is much less useful.

Plan uses TfL’s Journey Planner API to deliver results presented as neat swipe-able cards which drop into view. You can share the route with friends via email, or flip the card for a Google map complete with directions. A limited planning mode between stations only is available offline, and it saves every plan you create for reference any time, online or not.

While it remembers plenty of recently used stations and locations for your convenience there’s currently no ‘Favourites’ feature, nor an option to choose which methods of TfL transport the planner takes into account. However, I asked the developer, Andy Drizen, and he confirmed both are on the list for updates.

tube tracker alerts

Finally, the More tab hides the settings and developer support details, as well as the Alerts tool that lets you choose which lines to watch and at what times during the day you want to be notified about problems on them.

Tube Tracker has a few fancy tricks up its sleeve such as live-updating lists of every train running on every line, and the ability to send a train-tracking link to friends running the app. They’re not essential but they’re fun and kind of geeky. But there’s a couple more features I really love.

tube tracker launch Center pro

Firstly, official custom URL support: Andy has added custom URL schemes you can use to create actions in apps like Launch Center Pro that take you directly to certain screens in the app such as a particular Line status or a pre-filled Plan request.

For example, I worked out my home location as a GPS coordinate and used the instructions to build a ‘Plan Home’ action for LCP that will open Tube Tracker and automatically work out a route home from wherever I am with just a couple of taps. I borrowed the idea from the second app I talk about below, but that’s the beauty of URL support.

(If you’re interested in Launch Center Pro I wrote about it here.)

london tube apps tube tracker status board

And the other hidden gem in Tube Tracker is official Panic Status Board support. Tube Tracker is Universal which is nice but it looks best on the compact screen of the iPhone. However, if you’ve got Status Board installed and want something like the picture above you should visit this page to start setting up your very own Tube Tracker departure board, or read a bit more about what’s possible over at Panic’s blog.

It’s this kind of cool stuff that gets me excited about using an app to do something as mundane as plan my tube journeys, so Tube Tracker is now my favourite tube app and my top recommendation.

However, if you’d like to try a different take on the same sort of thing may I recommend you have a look at…

Tube Deluxe

London Tube Deluxe (69p), by Malcolm Barclay, was my go-to tube app for years, one of the first apps I ever got actually. While it appears to fulfil largely the same purpose as Tube Tracker, or vice versa, it has it’s own handy features you might consider.

At first look it’s fairly plain, but maybe you like that. Tube Deluxe’s look and feel is very much the iOS 6 standard, familiar table layouts, pinstripes, header bars and buttons. It’s done well and feels solid.

tube deluxe status maps

Down in the navigation tabs we start with Status, which provides line updates and access to custom Alerts. One advantage over Tube Tracker is the ability to re-order the lines to put your most-used at the top of the display. This would be a good screen to also view future disruption plans, as in Tube Tracker, but they’re hidden elsewhere.

Maps offers separate offline maps for the Underground, every individual Underground line, Overground, DLR, Tramlink and all rail connections, everything you’ll need. There’s also a geolocating Google map available but again it’s hidden elsewhere rather than being accessible from the Maps tab. One nit-pick: unlike Tube Tracker there’s no ability to search the map – you have to zoom in and scroll around looking for the station you want.

tube deluxe plan

The Plan tab offers as near as dammit the most complete Journey Planner experience on the iPhone. After setting the usual travel info you can dive into the settings to adjust preferred modes of transport, preferred numbers of connections, maximum walking and cycling distances, mobility requirements, and save Favourite locations. Tube Tracker doesn’t yet have this level of customisation.

The killer feature here is the built-in Plan Home button. Set up a Home location in Favourites and when you’re out and about and completely lost, tap this button and the app plans a route back home from wherever you are, just like that. Now that’s magic. It doesn’t work offline, but you can’t have everything and that’s what offline maps are for.

(Yes, that’s the function I nicked for my Tube Tracker/LCP action, which perfectly makes up for TT not nicking the idea itself.)

tube deluxe departures

Moving on, the Departures tab provides live station arrival and departure information from TfL, and as such it’s about as accurate as Tube Tracker, just less the fun display of the train moving between stations. There’s also no option to save favourite stations although you can quickly select the last four recently-viewed ones.

It seems odd that favourite stations from elsewhere don’t apply here, especially as I can easily push my ‘home’ station off the recently-viewed list in a day, and searching for it again involves a lot of tapping and swiping

tube deluxe london bus routes

Tucked away in More are various bits that didn’t fit elsewhere, including the Google map, a plain list of nearby stations, and planned closures by line and date (which splits the info and the date selection over two screens, awkwardly).

But there’s also a couple of invaluable hidden gems: full timetables of all TfL transport sorted by station, transit type, and date; and most pleasingly a comprehensive London bus route list with all stops for every route laid out on a Google map with geolocation so you can follow your bus journey and know when to get off.

These last two things are the sole content of some other apps, and it’s just tucked away in the back here!

So… Tube Tracker or Tube Deluxe?

It’s clear these two do pretty much the same things but right now I just love using Tube Tracker the most, for the look and feel, the more logical and efficient (to my mind) layout of features, and definitely all the really cool stuff like live compasses, train tracking, and Launch Center Pro and Status Board support. It makes navigating London by tube feel fun.

But for the completist in you, Tube Deluxe is unofficially pretty much TfL In Your Pocket in a familiar iOS 6 uniform. It just needs a bit of a feature reshuffle and then I want to see how it takes to iOS 7. And to be fair that’s probably what most app designers are thinking about at this very moment.

My solution to the conundrum faced by those seeking the best experience for their money is… get both! £2.68 buys you both the coolest and the safest pair of hands for travelling London both above and below ground. That’s less than the price of a Zone 1-2 peak single so you know what to do.

I use both of these in combination with this third app to master the tube and become a London Underground Ninja…

Tube Exits

Tube Exits (69p) – if there’s one app that emerged in the initial ‘there’s an app for that’ goldrush that made me sit up and go "Why didn’t I think of that?" it was this one. Believe me when I tell you that once you’ve used this app a few times you will curse yourself when you forget to.

london tube exits screenshot

You tell it your route (just the start and end will do, it does everything else) and it tells you exactly which carriage to get on at each station so that when you change lines or arrive at your destination, when the doors slide open you’re always right next to the appropriate exit. It also provides the latest line status and a tube map

If you’re a tube traveller yet to experience being at the wrong end of a platform at rush hour, get this app and spare yourself the misery. If you have, you’ve probably not even finished reading this page before heading to the App Store – you’re welcome!

By the way if you’re planning a trip to Paris or Berlin you can also pick up local versions for those cities – Paris Metro Exits, and Berlin U-Bahn Exits.

In summary

Do what I do and combine Tube Exits with either Tube Tracker or Tube Deluxe and you’ll pretty much have London transport cracked. You’ll know which lines have delays, what route you need to take, and which carriages to get on for the quickest transfers and exit. Sorted!

Categories
Reviews

State of Decay is utterly fantastic

It’s been a strange week for me. First my wife unexpectedly had to jet off to America with 24 hours notice, to be with family during a difficult time for them, leaving me to fend for myself for ten whole lonely days. And we’ve been exceptionally busy at work making the pilot episode of Smells Like Friday Night for Channel 4 (I’m a camera operator on it), culminating in a long but exciting 18 hour day on Friday.

Oh, and State of Decay, by Undead Labs, was released on Xbox Live Arcade, and it’s fantastic. The first I heard of this game was a couple of months ago when all the gaming sites evidently got a press release and pushed out an obligatory news story on it. I was excited at the description: an open-world zombie apocalypse base-building survival game?

I’M IN!

Oddly, there had been remarkably little marketing for the game. Even in the week of release, you would only have known if you read gaming sites that ran a short news story about it. I saw very little anywhere else, often another sign that confidence was low in the game.

But still, it looked and sounded great. If Undead Labs could pull it off, it could be the game Dead Rising should have been. So when release rolled around this week I dived into the demo as soon as I could.

Oh my God it’s good.

Yes, it’s a bit glitchy. Yes, there’s tearing. Yes, zombies often appear to clip through walls. Yes, graphical pop-in is practically an art-form at times, with scenery, cars and the zed themselves occasionally just materialising right in front of you, or blinking across an entire room without warning. Yes, the tutorial leaves a lot unexplained and the stick sensitivity is too low and it needs a bit of a bugfix for some gameplay stuff (which Undead Labs just confirmed is coming soon).

But none of this really matters once you start playing. State of Decay is the closest thing I’ve ever played to a zombie apocalypse simulator on the Xbox, and until Day Z or The War Z (since renamed) get out of beta or whatever state they’re in right now, it’s the only one I know of, and definitely the only one for the XBOX 360.

The key for me is that it’s so much fun playing it your own way.

Poring over the huge map trying to decide whether to head out to save those strangers who radioed in for help just now, or leave them to their fate while I raid empty houses for badly needed medical supplies and food for my own band of survivors, or go and see what it is that bunch of bombastic army grunts are actually up to, feels real.

Trekking solo across country, crawling most of the way to avoid detection by the roving hordes of zed, spotting a downed aircraft on the horizon just as the sun starts to come up and wondering if it’s worth the significant detour to see if there’s anything of use to plunder, feels real.

And when your character just broke their rusted machete, is down to their last handgun bullets and no silencer, badly needs sleep and medical attention, has no stamina left for a fight, is trying to flee a horde that just noticed them, and stumbles across the path of a feral zombie that in the blink of an eye picks up your weakened form and tears you literally into two… That’s a blow that both you and the survivors back at base camp feel.

(Don’t worry, you switch to a different playable character but you’ll need to level up all their skills again.)

If you have a 360 I highly recommend you download this and get stuck in, and join the 250,000 (and counting) other players around the world that are experiencing their own zombie apocalypse, and surviving it (or not) their way.

UPDATE: 16th June 2013, the first title update for State of Decay is out and as promised fixes a whole bunch of stuff, not least the rampant Infestation warnings. I’ve restarted my botched game and am loving being back amongst the shambling dead.

UPDATE 2: 20th June 2013, well it turns out that first update didn’t work. Apparently it was all there but something got messed up so that when it’s downloaded and applied to the game it doesn’t actually take effect. The good news is that Update 2 is in for approval with MS now and it apparently includes all the fixes from Update 1 and a whole bunch more, and this time it will definitely work. So they say… 😉

Categories
Editorial iOS & Mac reviews

My essential Mac, iPhone and iPad apps

Over the years I’ve picked up dozens of Mac apps and hundreds of iOS apps. New software comes and goes but over time the real keepers make themselves indispensable. I’ve now got a core of essential Mac and iOS apps that I turn to regularly, often as part of a workflow, so I thought I’d let you pick over them to see if there’s something cool that’s new to you. There’s also a bit about the hardware I use at the end.

Mac-only software

Mountain Lion – obviously. I like it.

SuperDuper! – for automated overnight local backups.

Backblaze – runs continuously to maintain an offsite backup for just $50 a year per computer. Read more about my backup tips and suggestions here.

Lightroom 4 – for importing, tagging and archiving my photography, and processing RAWs. It’s really simplified my workflow, doing the job of two other apps I used to rely on, Photo Mechanic and Nikon Capture NX 2; I keep PM around as it can be very useful, but NX is toast.

Hazel – a background utility that empties the trash when it gets too full, moves downloaded documents into folders in my Dropbox, and cleans out support files whenever I delete applications, and it can do so much more with custom rules.

Little Snitch – call me paranoid but I like to know what outgoing connections are being made by my software. I also enjoy the incoming/outgoing monitor that sits in my menubar, handy for at-a-glance indications of background network activity (Dropbox, Photoshelter, Backblaze etc).

Transmit – for uploading files direct to my website servers. Recently I’ve been enjoying the Transmit Drive feature which displays the contents of the server as a Finder window instead of inside Transmit.

DragonDrop – a fab background utility for easily moving several files at a time around in the Finder; just wiggle the cursor while dragging the files and the snazzy DragonDrop dropbox pops up to temporarily hold them, freeing you to navigate to their destination in the Finder; then pick them back up and drop them in place.

SMARTReporter – keeps an eye on my Macs’ S.M.A.R.T. status and runs I/O checks on connected drives throughout the day, emailing me if any checks fail.

Alfred – my default tool for launching apps, finding files, and logging into websites, all with just a few keystrokes. It also does clipboard magic, controls iTunes, and much more that I’ve barely scratched the surface of myself. Version 2 launched early 2013; read my initial impressions of version 1 here.

SimpleNote and Justnotes – my favourite note-taking-and-syncing service, and my client of choice for the Mac; I was using an excellent free dashboard widget, Dashnote, for years but Justnotes is a complete app with the sort of polish and feature support that comes with a paid product.

Bartender – tidies up the menubar to your personal preference. I wrote more about it here.

Radium 3 – hands down the best Mac app for streaming internet radio. Version 3 polished up the interface but introduced a bizarre new icon. If you still have Radium 2 and want to change the new menubar icon back to the superior radio icon, read my guide.

Billings – I use this to create nice freelance invoices and track my earnings, plus it’s fun to use and invoicing can be so boring. I use my own variation on a free Billings invoice template by Bart Kowalski.

There’s an iOS version but it’s not seen an update in a long time, only offers a handful of invoice templates, and doesn’t work with any custom templates created in the Mac app. So I don’t use it.

Undercover – lo-jacker software for my Macs; if they’re ever stolen, touch wood, this software kicks in to track their location and upload screenshots, webcam shots, and keystroke logs of everything they’ve typed (except passwords, just in case the backend is itself compromised). I use it in conjunction with a hardware password to prevent unauthorised re-installation of the operating system, meaning as soon as they go online they start blabbing. It’s cool.

Mac & iOS software

Dropbox – utterly essential for so many things these days; if for some reason you don’t already have a Dropbox account, a 500MB account is free and you’ll get yourself a bit extra on top if you go via via my link.

1Password – stores and generates passwords then locks them away so you only ever have to remember the one password that reveals them; it also installs a handy extension in most modern web browsers that will fill online password fields for you; on iOS you can use the excellent in-app browser. Everyone should use 1Password, even my mum.

Day One – a beautiful, flexible journalling app with Mac and iOS versions. My wife uses hers to keep a photolog of how the trees in our garden bloom and wilt across the seasons, while I use mine as a more conventional journal.

YNAB 4 – I use this mainly for our household budgeting, but I do my freelance budget with it too. I’ve always been aware of our money but YNAB really helps manage it better; I highly recommend trying it out. They’ve got a 35-day demo and if you decide to buy it and click this link first, you’ll get $6 off and I’ll get $6 commission – but I’d recommend it even if I didn’t.

There’s also a companion iPhone app for entering transactions as they occur, syncing with Dropbox. It doesn’t offer any budget management features and there’s no iPad version yet, but if you give the Mac app a go it’s very useful to have.

TextExpander – expands custom abbreviations into pre-saved snippets of often-used text. I use it for my contact details and certain HTML tags but it goes way beyond that. The iOS version is slightly limited in how it works due to Apple restrictions, but over a hundred and fifty third party apps support it including two of my favourites, Drafts and Poster (see below).

Fantastical – puts a handy calendar shortcut in the menubar and makes adding new events famously simple using natural language. I still use the Apple Calendar app to quickly copy-and-paste aspects of my weekly schedule that don’t change much but Fantastical is better for everything else and it syncs events with iCloud. There’s also a lovely iPhone app but as yet no iPad version – hopefully not for much longer.

Things – my to-do list app of choice. It’s not Universal and it’s not cheap to buy the whole suite, a hard sell when cheaper (but simpler) apps like Clear and Wunderlist exist, but each app is beautifully designed and now they’ve finally got their own Cloud sync running the whole suite is even more of a pleasure to use. My things-to-do go into the Inbox as soon as they occur via Drafts on my iOS devices, and the keyboard shortcut on my Mac, and get sorted into particular ‘projects’ later.

Photosync – for when I need to get photos and videos between any iOS device and Mac quickly and wirelessly (or even iOS to iOS); it requires a free ‘receiver’ app to be installed on any Mac you want to use it with, but it’s a much better solution than attaching cables or waiting for Photostream (which doesn’t do video).

Rdio – I didn’t used to see the point of subscription music services, preferring to own my music rather than rent it, but I realised I hardly ever buy music these days and have an ever-shrinking awareness of what’s new so for a tenner a month we have access to more than we could possibly ever listen to. Anything we really like we’ll pick up wherever it’s cheapest – often Amazon MP3 but don’t forget to check out smaller labels’ websites in case they sell direct for less.

Just be aware that if you sign up for a subscription within the iOS app you’ll pay a lot more than if you set it up on their website – this is presumably to cover the 30% cut Apple takes for iOS sales but I don’t think it’s at all fair of them to trick users this way, so sign up from their website to pay the proper price.

iOS-only software

Drafts – this ingenious app takes text you enter and then sends it to a whole host of other apps, such as Evernote, Fantastical, Omnifocus, Dropbox, Messages, Mail, and so on. I keep it in a handy Launch Center Pro slot and use it for sending stuff to Things and Simplenote mostly. Like Things, it’s not Universal; I only have it for iPhone as that’s what I usually have to hand when thoughts occur.

Launch Center Pro – speed dial for apps on your iPhone, without jailbreaking. I keep LCP and the Camera app in my Dock, only bare essential apps in my first Home Screen, and everything else in folders; peaceful! Read more about how I use LCP here.

Poster – for WordPress blogging from iOS. Poster is developed by Tom Witkin and boils a lot of functionality down to an attractive, lightweight interface. It’s got plenty of WordPress power-features tucked away if you need them including support for custom fields and custom post types, TextExpander Touch, Markdown and even 1Password. Fun factoid: I wrote and published this entire article in Poster.

UPDATE: sadly, or perhaps excitingly, Poster has been acquired by Automattic (who own WordPress) and removed from the App Store. Hopefully Tom Witkin will bring all the features that made Poster so amazing to the lousy official WordPress app very soon.

Reeder and Zite – for my kind of news, and other stuff I want to read. I know Google Reader is closing imminently but I like Reeder and hope to be able to keep using it via the developer’s own back-end solution. Zite has absorbed my RSS feeds and Twitter follows and uses those plus a Thumbs Up or Down from me to offer articles it thinks I’ll like from a variety of sources, grouped by topic plus a ‘Top Stories’ page.

Pocket – for storing things to read or watch later, almost exclusively from Reeder and Zite but occasionally from Safari using a bookmarklet. I used to use Instapaper for reading later and Pocket for everything else, but decided to consolidate as I much prefer the look and feel of Pocket.

Forecast.io – this free web app installs to your homescreen and offers surprisingly accurate forecasts in a simple, attractive way. It can narrow predictions right down to the minute the rain will stop, which is cool.

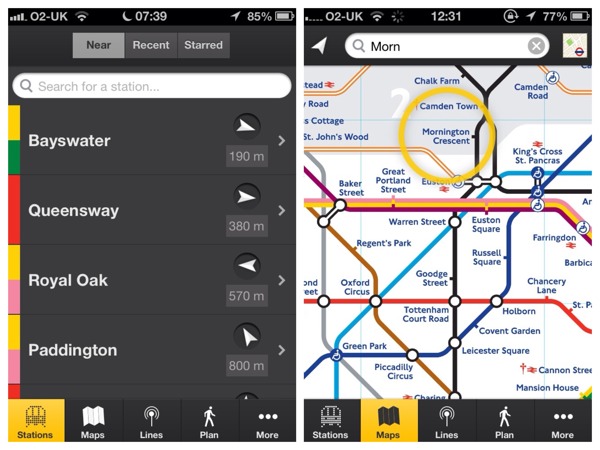
Tube Tracker, Tube Deluxe & Tube Exits – the three apps I use most when travelling around London day to day. Tracker and Deluxe do much the same job of providing maps, journey plans and travel news, but each with their own unique features; Tube Exits tells you which carriages to get on so that you arrive right next to the platform exit – you can shave a fair bit of time off, especially during peak times!

Quickshot – this iPhone app snaps a photo, tags it and uploads it to a selected folder in Dropbox immediately. I use it exclusively to snap work expense receipts so I don’t have to worry about losing them.

KitCam and Hipstamatic – the two camera apps I use most after the stock Camera app, for satisfying creative urges. Sometimes I use Camera+ for ‘clean’ shots but when I want to grab something quickly its usually fastest to use the slide-up Camera button on the lock screen. I did used to use Instagram almost exclusively but recently took a leave of absence from all social networks to try and cut down on ‘noise’ in my life from digital stuff.

UPDATE: Sadly, KitCam was bought by Yahoo in 2013 and taken off the App Store permanently.

Calcbot – I prefer this to the stock Calculator app mainly because of the ‘print ribbon’ of previous calculations that you can pull down from the display, but also because I love the Tapbots app designs.

Meter Readings – for recording our gas and electricity usage weekly. It has comprehensive options for entering current and previous tariffs so you can keep ahead of your bills, and there’s excellent support from the one-man-band developer behind it, Graham Haley. Geeky, perhaps, but very useful.

Quicklytics – the best Google Analytics app I’ve tried, taking the user-unfriendly mash that is the GA web interface and presenting key data points in a clean, friendly way.

TuneIn Radio – there’s a lot of radio-streaming apps for iOS and I’ve tried most of the good ones, but this is the one that stuck.

TV Catchup – bit of a misleading name because this streams live UK Freeview television rather than letting you play it back like a DVR. In a nutshell, it’s live telly on your iPad.

Hardware

Late 2012 27" iMac – my previous iMac was a Mid-2007 model (the first aluminium one) and it was getting a bit long in the tooth for the stuff I was throwing at it, like hundreds of RAW files at a time. There wasn’t anything I needed that it couldn’t run acceptably, but it used to do everything so much faster. Now it has a new home in my mum’s office/recreation room, where it’s a considerable upgrade from her original white iMac.

These new iMacs with Fusion Drives are just great: boots from cold in about 10 seconds, apps launch so fast, it crunches through 1:1 previews in Lightroom 4 at a fantastic rate, and the glossy mirror-like screen of yore is now a near reflection-free surface. It’s just a delight to use.

The only thing is I had to pick up a couple of Thunderbolt-to-FireWire adaptors at £25 a pop for my hard drives, and my main machine now doesn’t have an optical drive. As it happens pretty much all the software I use is distributed digitally and since I started using Photoshelter two years ago I haven’t had to burn a single photo disc for clients, but if that does ever come up I’m going to have to look into the Remote Disk function on my MBP.

Wacom Intuos pad – this is great for Photoshop and handy in Lightroom too. Occasionally I use it in games like Civ and XCOM too.

LaCie Quadra hard drives – solid, stable external hard drives for storage and backups; check out my post on backup strategies for more info.

They’re bolted into the LaCie desktop rack, which keeps them safe under my desk. It’s £50 for a bit of metal and some rubber feet that fall off if you look at them funny, which is pretty steep, but the drives are much more secure in it than not so I sucked it up.

2010 15" MacBook Pro – I got this anticipating needing it on location shoots so I went for a Pro. In the end it rarely went on location so these days I use it for tweaking my websites, writing and invoicing away from my main desk. It handles iMovie 11 very well, but Final Cut X is too much for it.

For a while I tried to use it for photo editing too but syncing photoshoots between the two Macs was a total pain in the neck; I considered a Dropbox sync but it isn’t a practical solution for syncing sets that are frequently more than 6GB in size. Clinching it, Lightroom really requires the LR library to be connected to the computer you’re running it on. So, I keep my photo work on my iMac and life is simpler for it.

I also play a couple of games on it, mainly the Prison Architect alpha and the new XCOM (see my post here for how to sync Mac XCOM save games using Dropbox), and my wife uses it regularly to type up her Montessori college work.

If money was no object I’d like to sell it and get one of the new Airs as they’re much lighter and more powerful these days, but I’ll probably end up hanging onto it for many more years until it literally dies in my hands, by which time iPads may have evolved far enough to completely replace it.

iPads – I have a 3, my wife has a Mini; both were upgrades from an iPad 1. I appreciate the screen size and sharpness of the 3 but I *love* the weight and general handiness of the Mini.

Apple TV 2 – excellent for Netflix and for iTunes movie rentals (which are often preferable to going to the cinema in our house); I’ve jailbroken mine and installed Firecore’s ATV Flash Black software so I can stream media we already own direct from the iMac in pretty much any format instead of having to import it to my iTunes library. Unfortunately the ATV3 is still impossible to jailbreak so I hope my ATV2 stays healthy.

Airport Express – for streaming music to our lounge speakers from any Mac or iOS device. We have the old-school plug-like A1088 version which can be problematic under Mountain Lion – see my article here for tips on how to fix that.

Other stuff

Herman Miller ‘Mirra’ chair – not cheap, but worth every penny. An incredibly comfortable chair with so many points of adjustment it’s always exactly how I need it, be that sitting upright to work or leaning back a little to enjoy a movie or game. The only problem I have with it is that the area under the seat is a massive dust-trap that needs some serious cleaning out every couple of months.

Harman Kardon Soundsticks – I have version 2, but version 3 is available now. The subwoofer goes under my desk and the two sticks sit behind my iMac, bouncing the sound off the wall. Much better than the comparatively weak sound the new iMac produces, although if I didn’t already have these I’d probably have been fine with it.

What makes your Macs tick?

So that’s what I run on my own Apple devices – what about you? Get in touch by email or in the comments and thanks for visiting.

Categories
iOS & Mac reviews

Vdio review: Rdio’s new video-on-demand service

Vdio is a new video streaming service from Rdio, currently in beta. Last month Rdio invited their premium subscribers in the UK and USA to try it out, offering a £20 (or $25) credit to kick the tyres, and as a happy Rdio user I was interested enough to give it a go. Plus, who could turn down £20 worth of new release rentals for free?

Given that a lot of the work I do is for the TV and movie industries, I watch surprisingly little TV and hardly ever go to the cinema. This latter decision is largely down to two things: quality and price. Instead, my wife and I rent new release movies from iTunes via our Apple TV and watch them on our widescreen telly in the comfort of our lounge. It’s vastly cheaper (generally £4.49 for us both to watch a new release at home as opposed to about £20 to see it at the cinema), with no annoying chatters/rustlers/texters, no need to leave the house, and all the mid-movie snacks and refreshments we like, including the all-important stash of cold Brewdogs.

Yes, some films are better experienced at the cinema with the bigger screen, the sound, and the ooohs and aaaahs of a rapt audience, but we find those movies are few and far between and even then it really takes something special to make it worth the 400% higher price, the annoyance that comes with mixing with the general public, and the trek to the cinema; your mileage may vary, obviously, but we like to watch at home.

Enter Vdio

Despite the affiliation, Vdio isn’t ‘Rdio for film and TV’. Where Rdio takes a flat monthly rate and lets you stream and cache as much music as your ears can listen to, Vdio is really just like iTunes, only offering purchases and short-term rentals.

This is probably a licensing thing; studios are not going to let the general public mass-stream as many new releases as they like for a flat rate paid to a third party. That’s why Netflix only really deals in older shows and movies, where the licensing is a lot less restrictive (although they can still lose thousands of films and shows at a time when their license agreements with the studios end).

So in a world where I’m happy with iTunes rentals, Vdio has to go some to get me interested and fumbles the ball by only offering streaming; you can’t download and keep your purchases, or cache them locally Rdio-style (although they say this latter feature is in development). I’m not going to purchase a digital video I can’t download and keep forever, so it’s the first black mark.

What’s it like to use?

Despite the streaming limitations I can’t turn down £20 of free rentals and so this weekend we decided to try out the service to watch Jack Reacher. Unfortunately, I can’t tell you what the movie is like because we couldn’t watch it the way we wanted to, via Airplay on out TV, which may or may not be a problem with Vdio or with my ATV – the Vdio support team immediately blamed the ATV, which I’m not sure is actually the issue.

It’s not all bad, though. Here’s what our experience of using Vdio from a iPad was like:

Firstly, browsing and purchasing has to be done in a web browser, with viewing taken care of by a Vdio app. The reason for this is that if Vdio made purchases available within their app then Apple would want 30% of the price. To get around this the transaction has to be done in the browser, with the added wrinkle that the Vdio app can make no mention of that or else Apple gets sniffy again. Indeed, the app just shows a Purchases screen and Sign Out button.

It’s not ideal but it’s not Vdio’s fault – to give just one high-profile example, the same limitations affect Amazon’s Kindle app which no longer offers a link to the Kindle store for the same reason.

As a side note, it’s curious that their Rdio app does offer to sell you either of the two Rdio subscription models available, but if you make the mistake of signing up within the Rdio app you’ll pay about 30% more than buying the exact same subscription from the Rdio website because they hiked the in-app price to cover Apple’s 30% cut. That’s bloody cheeky, in my opinion, and unfair on customers who would rightly assume that buying a subscription should cost exactly the same no matter where it’s purchased from.

I was pretty sure that Apple specifically banned this practice precisely because it lets users down. Perhaps they relaxed the rules on it. Either way, if you’re considering an Rdio sub you should be aware of that and sign up from the Rdio website and not the app. If you’re wanting to purchase Vdio stuff, you’ll need to head to their website.

Browsing and purchasing

Vdio’s website itself is a sleek black and yellow design with sections for Movies, TV, Favourites and your purchases. There’s also a social aspect carried over from Rdio in which you can see what your Rdio friends are watching. Personally I don’t use these sorts of social features but they’re there if you want them.

There’s been a lot said of Vdio’s sharing policies as published in their Terms and Conditions, that almost all of us sign up for without reading these days. Essentially they reserve the right to publish your viewing history publicly unless you turn that off immediately, so go looking for that control first if that bothers you.

The one criticism I have of the site from a usability point of view is that it’s not clear if a movie is available for rent, purchase, or both, and neither is it clear what the price is; both are revealed when you click the button marked ‘Watch’. This seems pretty counter-intuitive in the world of one-click-purchasing ("If I click ‘Watch’ won’t it take the money from my account?") and wastes clicks as you have to first tap on the film to see the description (including a trailer if available) then tap on ‘Watch’ to see the price, then tap a third time to make a purchase. Compare this to iTunes where one tap displays the description and price on one screen, and the second makes the purchase.

Their FAQ explains where to find the prices; my argument would be that if you have to explain where to find them, they’re in the wrong place.

Purchase or rental made, now you hop back to the app to watch it. All this works just fine with purchases showing up immediately. However, when we then tried to stream the video via AirPlay to our Apple TV 2, problems arose.

AirPlay problems

The stream attempted to start, the iPad screen displaying ‘streaming over Airplay’ and the TV screen showing the usual Loading spinner, but failed immediately, returning us to the ATV menu screens. We tried with an iPad mini and an iPad 3 and both failed. I restarted all the devices and tried again, and also tried the next day in the hope that perhaps the problem solved itself, but to no avail.

A quick check of other iOS apps that stream video via AirPlay (for example, Google’s YouTube app) revealed that this problem seemed unique to the Vdio app.

Perhaps it’s because I am running a jailbreak on my ATV in order to use Firecore’s ATV Flash Black software. The version of iOS it’s running isn’t the latest but it’s recent enough to support Airplay and mirroring, so it would be unfortunate indeed that Vdio is the only app that doesn’t support Airplay to jailbroken ATVs.

In the end we attempted to watch Mr Jack Reacher doing his thang by running the movie on the iPad and mirroring the screen to the ATV over Airplay. However, due to way mirroring works we ended up with a pretty huge black border all the way around the video, making it appear we were watching it on a tiny 19" LCD as opposed to the 37" screen it actually is, and after half a hour of struggling to enjoy this experience we gave up.

A couple of days later I tried streaming a ‘Preview’ and that worked fine, as it has done before. Perhaps there was just an issue with that movie, but Vdio say if anything it’s Apple’s device so it’s Apple’s problem.

Nitpicking: splash-screens and previews

On a very nit-picky note, the splash-screen that greets you while the app starts up looks alarmingly like your iPad screen has been sloshed with liquid, damaging the LCD and causing weird discolouration; I speak from experience of having done exactly this and so the first time I fired it up it gave me a good twenty seconds of panic while I double checked my screen in other apps.

I know, it’s not the end of the world, but remember when Apple used a time-lapse image of a night sky as the wallpaper for the very first iPad and the star-trails looked like scratches on the screen to the uninitiated? Well, it’s like that; it’ll probably only bother you the first (couple of) times you launch the app, but it’s a curious choice.

Secondly, those ‘Previews’ aren’t trailers; they’re usually the first few minutes of the film, credits and all, which aren’t that helpful for deciding if you want to watch something. Mind you, trailers aren’t that reliable either but I’d prefer to see them. I wonder if it’s another licensing issue?

Pricing and quality

I compared a bunch of their movie and TV prices against those offered by iTunes and the short story is that they’re practically identical across new and old releases. Apple undercuts Vdio more often than Vdio undercuts Apple, but it all balances out in the long run. There are outliers, though; for example, Argo is £4 more expensive to buy from Apple so if you have access to both services it pays to check, assuming you don’t mind the lack of Vdio downloads.

Vdio skirts around making promises about video quality by offering just one set of rates and stating only that they provide the "highest definition" that they can, whereas Apple usually offers both SD and HD qualities and rates.

In practice, our iPad stream of Jack Reacher wavered between apparently high definition and soft-as-old-boots definition; this happens with iTunes streams as well, to be fair, and is just a side-effect of internet video streaming. If your connection is fast and solid, you’ll be fine.

The big problem Vdio has in comparison to competitors like iTunes and Amazon, as I mentioned before, is that Vdio doesn’t offer permanent downloads of your purchases, nor offline cacheing of rentals – if you’re not online, you can’t watch anything. iTunes also offers downloadable ‘extra features’ on an increasing number of titles, which Vdio lacks.

Cacheing for offline play in particular is something Rdio excels at. They say this feature may be coming in the future and as the service is still in beta that’s a perfectly tolerable delay, but if it remains impossible to download and permanently keep your own copies of purchased films or TV series that would be a deal-breaker.

In summary

By replicating the iTunes video business model but not their feature-set Vdio as it currently stands is a bit of a disappointment, especially given the problems I encountered streaming via Airplay and then troubleshooting the problem on their forum. I think it’s a good tactical move for Rdio to get in on the digital video market now while it’s building pace with consumers, but on the basis of this offering there’s a lot of development to be done before it can compete with the other big names like iTunes and Amazon.

At best it’s a great option to compare rental prices against the competition, or if you have a pathological aversion to giving money to Apple/Amazon, but I’ll never be able to recommend purchasing digital movies from a company that won’t (or can’t) let you keep your own offline copy.