 I’m on another short film doing stills this weekend – another freebie but I’m fortunate enough to have another stream of income right now so I can afford to do a few freebies for friends. It’s a great source of experience and gets me some more shots for the portfolio. Plus, in the past these projects have allowed me to meet other professionals who then take me onto paid work with them. This post is about what happens when I get to the first day on a new production, and specifically the first 10 shots (or thereabouts) I take to get me going.
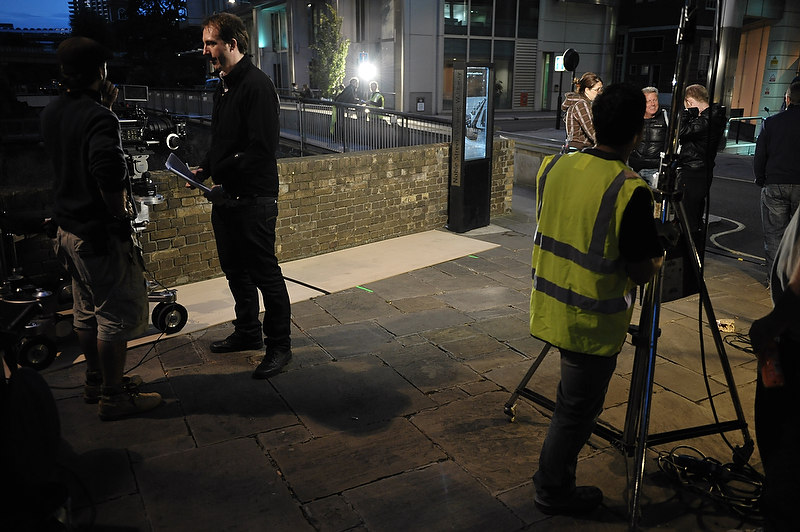
This film is called The Golden Boy and the man calling in the favour is Danny Bishop (operating the camera on the left here), a talented camera operator with whom I worked on Reuniting The Rubins earlier this year. He’s the sort of man who inspires total confidence and trust so it’s a pleasure to work with him, and indeed at least half the crew on this short came from Rubins.
It’s a 3-day shoot, working overnight from dusk till dawn on the streets of London. On day one a lot of people will be seeing new faces, although there’ll also be a lot of people who have worked together in the past. Within each department people will generally know each other already, as that’s how everyone gets work – they’re hired by someone they’ve worked for before who liked them.
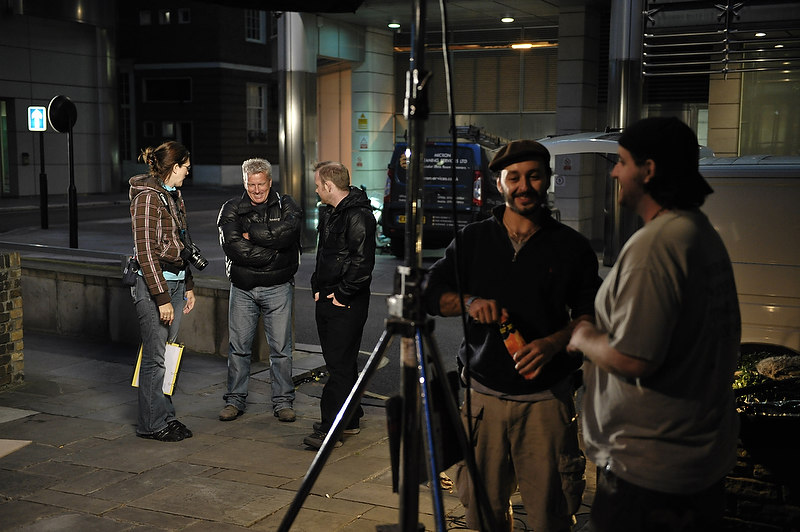
The the first thing I try to do is introduce myself to the 1st Assistant Director, the 2nd if they’re around (they’re usually back at the unit base), and any of the 3rds I can find. The 1st is running the set while the director works with the creative aspects, and on occasion I might not be able to get the shot I need due to camera position. In those cases it’s the 1st that will be able to get a scene run again just for me, so it’s essential to have a good relationship with him or her. I’ll say hi and let them know my name, find out if there’s anything I need to know already, shoot the breeze for a couple of minutes if there’s time, and then let them get on with their extremely busy job.
Then I find the camera crew and say hello to them when I get a chance, although the conversation is generally a lot shorter because they’ll be focussing very intently on their own roles tending to the camera, especially on the first day when everyone is making sure that the first shot goes off without a hitch. I’m going to be hovering very close to them a lot of the time and I need them on my side so I make a very good point of remembering names (which I’m pretty awful at these days!) and then finding somewhere safe to hide while they’re running back and forth with lenses and cables and tape measures and actors marks.
Now I get my camera set up, once I’m comfortable that people in my immediate vicinity know to expect a stills camera pointed at the action. Got to start somewhere so I’ll either make an educated guess at the settings and fire a shot off, or I’ll just fire one off with whatever I’ve already got programmed in and go from there. I’ll almost always shoot manual settings on a film because the lighting is set up to remain constant.
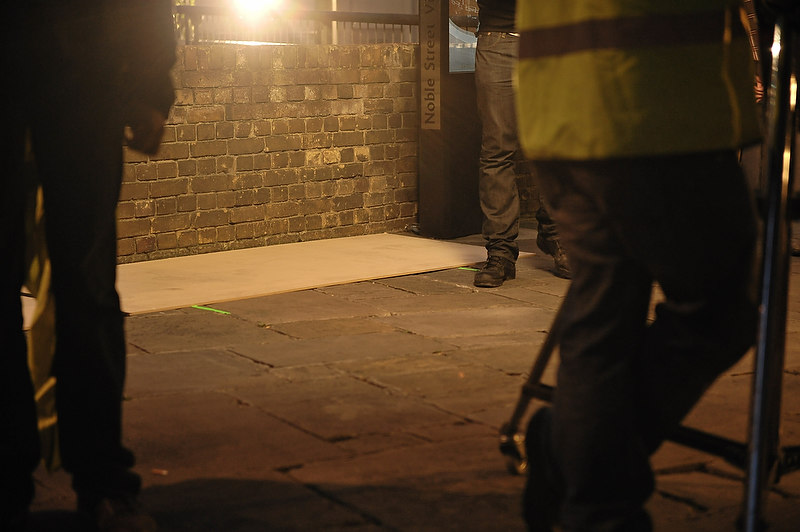
Here’s my first shot. It’s shot on aperture priority as that’s what my camera was on when I pulled it out the bag:

ISO 1600, f/5.6, 1/160, Cloudy
Way underexposed! The bright light in the middle is set up down the street pointing back at the actors for both fill and backlight, depending on where the actors are standing. It’s firing straight into my lens, and so aperture priority mode has screwed up his eyes and wailed “Too bright!” and produced a fast shutter. Next shot I switch to Manual mode and slow down the shutter.

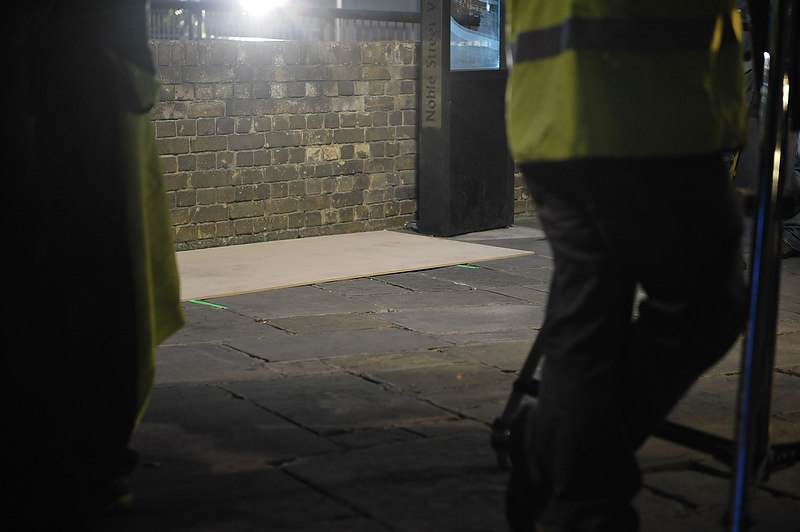
ISO 1600, f/5.6 1/50, Cloudy
The shutter is now dragging too long really. At 1/50 I’ll never get frozen motion, and probably lots of camera shake, and it’s still underexposed. I’m going to have to put the ISO up past 1600 – good thing I’ve got a D700, eh? Those boards have been laid down to smooth the track on that the camera will make on the dolly (the wheeled trolley it’s attached to). Usually dolly tracks will be used, which the grooved wheels ride on, but it’s possible there wasn’t enough budget for them on this short.

ISO 2500, f/2.8, 1/25, Sunny
Much more light getting in now. Why did I make the shutter even slower? I’m not sure. Bit daft, really. By the way, the stand on the right is supporting the main light for this location. I’m not great with the names of lights. Let’s just say it’s a big one, and it’s got a huge softbox over it, probably about 5 feet square.
I can see that the white balance is going to have to change, probably to Tungsten, and I can now afford to pull the shutter back to something much more reasonable. Shutter first:
ISO 2500, f/2.8, 1/60, Sunny
That’s better. Way too warm, and still a bit bright really. 1/60 is about as slow as I’ll go on a film if a scene is relatively static and I absolutely need the light, but is still useless for freezing motion enough for my needs.
Time to switch the white balance:
ISO 2500, f/2.8, 1/125, Incandescent (Tungsten)
Now we’re pretty much there. Good shutter speed, good white balance. Feels a little cold – even though I’m shooting RAW so I can tweak it all later if I have to, I’d rather get it as close as dammit right now so I don’t have to faff around later. I know that’s the luxury of RAW, but I think you can get bogged down in that and I’ll cheerfully argue the point with those that criticise not taking advantage of the post-processing freedom RAW gives you. Get it right in the camera and I can spend more time on the couch at home.
Next shot I try what I perhaps should have done in the first place – I try Auto White Balance:

ISO 2500, f/2.8, 1/125, Auto WB
See, the camera thought tungsten all along. But just that tiny bit warmer, and you know I agree. However, I’m not given to trusting living in Auto settings for film stills because they can change from shot to shot given what’s in the frame, and I need consistency over a long period, so I go back to Tungsten and warm it up in-camera.

ISO 2500, f/2.8, 1/125, Tungsten A5
Tungsten A5 refers to the D700’s warmer/cooler tweaks for white balance. Cooler is B1-5. It looks good to my eye and if it’s not right later, I can still always tweak. I think it’s good. So I grab a wider shot to check once more:
ISO 2500, f/2.8, 1/125, Tungsten A5
It’s perhaps a bit bright – films are almost always underexposed compared to what a stills camera says is a good exposure, but I’ll wait till the actors are in the shot to see how the light plays on them. One last shot, decently framed at last!
ISO 2500, f/2.8, 1/125, Tungsten A5
And now I’m ready to go! Over the course of the next two hours my settings rarely changed, except I did go up to ISO 3200 and had to move my shutter speed around from 1/80 to 1/160 depending on where the actors were. They moved around the corner of the wall and it was a lot darker on the other side, plus I felt some my shots were a bit bright overall so will bring them down around half a stop in Capture NX2 today.
Hope this was interesting reading to someone – you’ve got to start somewhere and sometimes it’s to shoot full auto and tweak those settings if they’re pretty good, other times I just work it one setting at a time, putting the ISO up only when I’m dipping into slow shutter territory.
I’ll post a few shots from the shoot once I’ve finished on it – I’m back there on Sunday night. Thanks for reading!
 It’s been pretty sunny in London recently, although not so much the last few days. Yesterday, however, the sun was threatening to come out from lunchtime and at around 3pm it finally did. I was sitting around indoors finding all sorts of ways to do not very much at all and finally realised going outside and maybe taking some photos would actually be pretty cool instead.
 (UPDATE: February 2012; after I posted this I realised that some of the latter shots were a bit dark; the effect of the Softbox is visible but needed a bit more power, and it was underexposed overall. For many, many months, years in fact, I always meant to dig out the shots and lift them a bit in Photoshop but never got around to it.
 I first picked up a DSLR (or indeed any SLR) in 2005 when I bought my Nikon D70, and for the next 3 years flash lighting scared me witless. In a medium where light is everything, being unwilling and unable to get a grip on how to light with flash was sort of an embarrassment, to me at least, and so I embraced a style of photography that studiously avoided staged lighting – which I cunningly branded ‘urban observational photography’. So, er, basically cool stuff I spotted on the street, like this revolving billboard on the left.