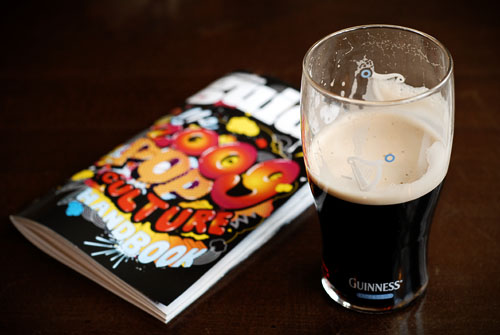
Today I posted a new image from a local pub that at the time I took it was a really nice photo as it stood. Really nice soft natural light, nice depth of field and sharpness with the 50mm f/1.8 lens, simple subject matter, popping colours, and beer. Perfect. 🙂
I did give it a little lift in Photoshop though, as I often do. I just like my images with a bit more pop or a push one way or the other. As it was a really simple few layers I used, I thought it would make for an easy explanation!
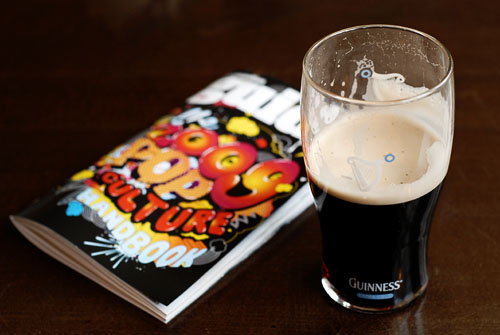
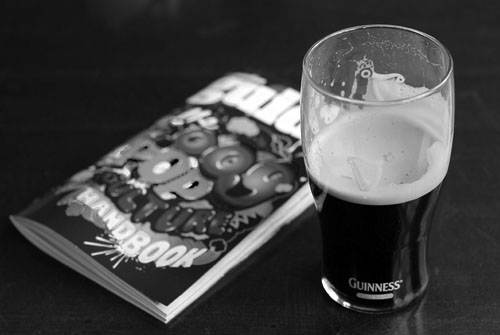
First of all, here’s the original photo straight off the card, untouched by any editing software beyond the JPG settings on board the camera:
I don’t always know what I’m going to do to a photo when I first open it in Photoshop. There’s a few things I always tend to do first to see what happens, such as duplicating the background layer and setting it to Overlay or Soft Light blending. These pump the image with contrast and usually need the opacity lowered.
Another one I often use is creating a B&W version of the background and setting that to the same blending modes. It has a similar contrasty effect but can also add pleasingly desaturated richness. This was the first step I ended up taking with this as it instantly appealed.
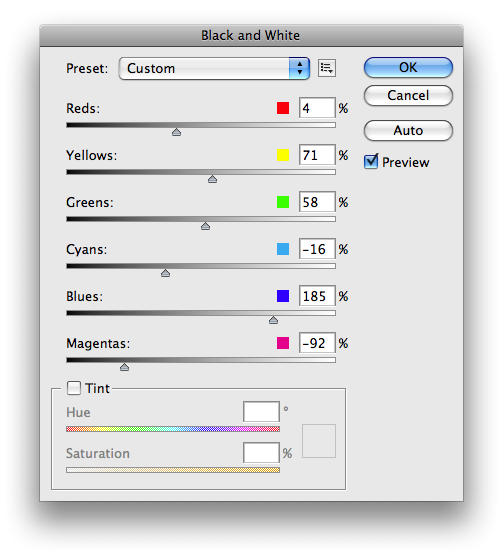
I use CS3 which has a new Adjustment Layer called Black & White, introduced to make it even easier to create your own tone of B&W. If you have an earlier version you can use the Channel Mixer set to Mono to create the same thing – it’s just a bit more complicated a tool.
So, on the left are the final B&W settings I used.
When you adjust the settings on the panel you see your photo’s black and white tones changing in the background (unless you uncheck Preview). In this instance I set these not necessarily looking for a pleasing B&W image as I would normally, but more in anticipation of what would likely happen to the colours when I changed the blending mode afterwards. Typically, dark tones result in deep dark colours, and lighter tones result in brighter colours. Once I changed the blending to Soft Light I went back and tweaked the sliders to fix the resultant colours.
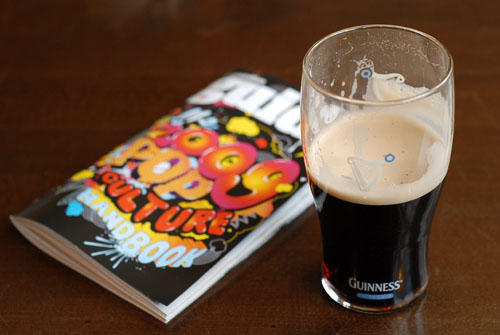
Below left is the effect of the above settings on the image when the Black and White adjustment layer is set to Normal blending. On the right is the effect of switching the blending of that layer to Soft Light.

I like the contrast this provides – the richness of the varnished wood, the popping colours of the cover. But I don’t like that I’ve lost a lot of the table detail in the shadows. So, I decide to lift the shadows a little bit by using a Curve adjustment layer.
 I’m going to assume you know basically how the Curves tool works – if you don’t then you can still play with this anyway. It’s the best way to learn anyway!
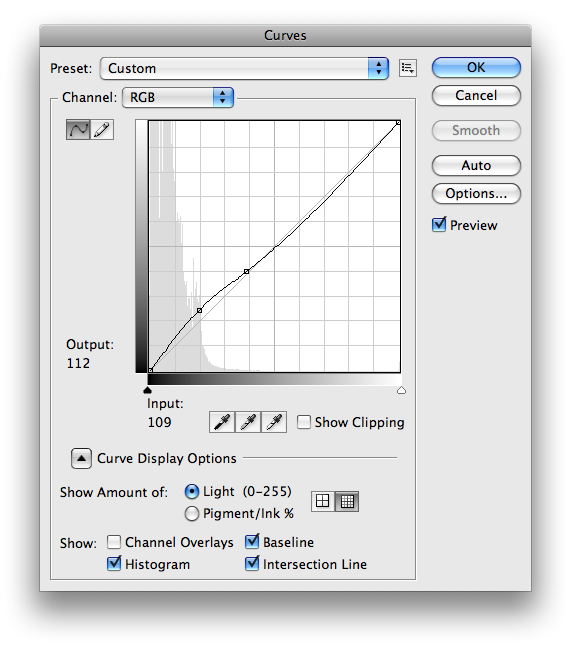
As you can see I’ve lifted the brightness of the shadow areas with the first anchor point along. This was lifting up the highlights as well, losing the detail in the foam and blowing the white Guide letters out.
So, I added a second anchor and placed it so that the ‘highlight’ tail of the curve comes back down to where it was. In fact, I pulled it a bit under because I noticed it put some tone back in the white letters.
At this point I decided that I preferred the contrasty colours in the magazine and the glass before I lightened the wood. The best way to get the effect of that B&W layer back is to paint a mask on the curve layer above it, allowing everything beneath it to show through again.
The last thing I add is a bit of vignette, something you’ll probably notice me adding to a lot of my photos. I have a bit of a thing for how it draws your eye in, creates this atmosphere around the subject.
 There are many ways of creating a vignette. I like mine around the corners, heavily feathered so they creep up on you rather than bashing you around the head, and adjustable. So, it’s a Curve adjustment layer again! I create a layer mask on the Curve layer and then use a pre-recorded action to load the mask in. I then either go into the layer and drag a portion down into the shadows, or sometimes I just leave the settings exactly where they are and instead set the blending to Multiply. And as with every Adjustment Layer there’s always Opacity to adjust for quick fine tuning if it’s too much.
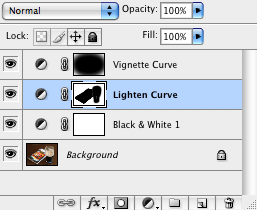
On the right here is my Layers palette at this point. You can see the mask for the glass and magazine on the Lighten Curve, as well as the soft corners in the mask for the Vignette Curve.
And we’re done!
Below are the four main stages again, moving clockwise from top left.